Grinding Techniques
Master the art of grinding with proper grit selection, pressure control, and technique for optimal surface quality in metallographic sample preparation.
Table of Contents
Introduction
Grinding is a critical step in metallographic sample preparation that removes sectioning damage and prepares the surface for polishing. Proper grinding technique ensures that scratches are progressively removed without introducing new damage or deformation.

Grinding and lapping consumables including silicon carbide papers, powders, and accessories. Progressive grinding removes sectioning damage while preparing the surface for polishing.
The goal of grinding is to remove the damaged layer from sectioning while creating a uniform scratch pattern that can be easily removed during polishing. This requires careful attention to grit progression, pressure, and technique.
Grit Selection
Selecting the appropriate starting grit depends on the amount of sectioning damage and the material being prepared. As a general rule:

Silicon carbide (SiC) grinding papers available in grit sizes from 120 to 1200. Start with coarsest grit needed to remove sectioning damage.

Silicon carbide grinding powders for specialized applications. Powders can be used with lapping plates for precision grinding.
- 120-180 grit: For heavy sectioning damage or very hard materials
- 240-320 grit: For moderate sectioning damage (most common starting point)
- 400-600 grit: For minimal damage or soft materials
Always start with the coarsest grit necessary to remove sectioning damage efficiently. Starting too fine will prolong the grinding process and may not fully remove damage.
Example Products: Silicon Carbide Grinding PapersSiC grinding papers available in all standard grit sizes
For purchasing options and product specifications, see commercial supplier website.

Equipment: Hand & Belt Grinders
Hand and belt grinders are used for manual planar grinding and rapid initial material removal, with water cooling to limit heat and flush swarf.
View Hand & Belt Grinders →Grinding Sequence
A typical grinding sequence progresses through increasingly fine grits. The key is to ensure that all scratches from the previous grit are removed before moving to the next.
Standard Grinding Sequence
- 120 grit: Remove sectioning damage (30-60 seconds)
- 240 grit: Remove 120-grit scratches (1-2 minutes)
- 320 grit: Further refinement (1-2 minutes)
- 400 grit: Continue refinement (1-2 minutes)
- 600 grit: Final grinding step (1-2 minutes)
- 800 grit (optional): For very fine finishes (1-2 minutes)
- 1200 grit (optional): For ultra-fine finishes (1-2 minutes)
Why Each Step Must Cut Below the Last
Each abrasive size leaves a damaged subsurface layer roughly 1.5-3 times the abrasive particle diameter. The next step must cut deeper than the previous step's damage depth, or that damage is preserved beneath a surface that looks clean. This is why skipping grits saves no time: the following step simply takes longer to clear the residual damage.
Rule of thumb: at each grit, continue for about twice the time it takes for the previous step's scratches to visibly disappear. The visible scratches go first; the subsurface deformation beneath them takes the second half of the step.
Important: The exact sequence may vary based on material and initial damage. Always inspect the surface after each step to ensure complete scratch removal.
Proper Grinding Technique
Sample Orientation
On a belt or stationary paper, where scratches are unidirectional, rotate the sample 90° between each grit. The previous scratch pattern is then perpendicular to the current one, making it obvious when it has been fully removed. On a rotating platen the scratch pattern is multidirectional, so rotation matters less, but inspecting the surface between steps under good light remains essential.
Grinding Motion
- Use a figure-8 or circular motion for even material removal
- Cover the entire sample surface evenly
- Avoid staying in one area too long (prevents over-grinding)
- Maintain consistent contact with the grinding surface
Rotation Direction (Automated Heads)
On machines with a powered sample head, co-rotation (head and platen turning the same direction) is the gentler default for routine grinding and polishing. It reduces tearing of soft phases and distributes pressure more evenly. Counter-rotation gives more aggressive abrasive contact and has its place in specific edge-retention-sensitive work and on harder materials, but it is not a universal default. Treat rotation direction as one tunable parameter among many; mount quality, abrasive selection, force, and time matter more for most outcomes.
Manual Grinding with PENTA 7500S & PENTA 5000A
Learn proper manual grinding techniques from Dr. Donald Zipperian. This video demonstrates correct sample orientation, grinding motion, pressure control, and proper use of manual grinding equipment.
Video by Dr. Donald Zipperian, PhD - PACE Technologies | Watch on YouTube
Automated Grinding & Polishing with NANO 1000S & FEMTO 1100S
Watch Dr. Donald Zipperian demonstrate automated grinding and polishing using a manual polisher fitted with a semi-automatic power head. Learn how to program and operate automated systems for consistent, repeatable results.
Video by Dr. Donald Zipperian, PhD - PACE Technologies | Watch on YouTube
Time Management
The planar step typically requires 30-60 seconds and subsequent steps 1-2 minutes each, but this varies based on:
- Material hardness
- Amount of damage to remove
- Grit size (coarser grits may need more time)
- Grinding pressure applied
Pressure Control
Applying the correct pressure is crucial for effective grinding. Too much pressure can cause deformation, while too little may not remove scratches efficiently.
Guidelines for Force
Force depends more on the material than on the grit. Typical per-sample values:
- Steels, copper alloys, superalloys: 25-35 N (about 5.5-8 lbf)
- Soft metals (aluminum, lead, tin): 10-15 N (about 2-3.5 lbf) to avoid abrasive embedding
- Hard ceramics: 40-60 N (about 9-13.5 lbf)
Reduce force slightly at the finest grits, where the goal shifts from material removal to surface refinement.
Rule of thumb: Use enough pressure to maintain contact and remove material, but not so much that you feel excessive resistance or see deformation.
Platen Speed
For rotary grinding, run the platen at 200-300 RPM with a copious water flush. Pressure and velocity multiply: increasing either raises the removal rate, but both are limited by what the sample tolerates without deformation. Slower speeds (100-150 RPM) are reserved for the polishing and finishing steps that follow grinding.
Pressure Distribution
Distribute pressure evenly across the sample. Avoid concentrating pressure on edges or corners, which can cause rounding or over-grinding.
Lubrication
Proper lubrication is essential for effective grinding. It serves multiple purposes:
- Reduces heat generation
- Flushes away removed material
- Prevents loading of the abrasive
- Reduces friction and wear
Lubricant Selection
- Water: Most common, suitable for most materials
- Water with surfactant: Better wetting for some materials
- Oil-based: For materials that react with water
- Specialized fluids: For specific applications
Apply lubricant continuously during grinding to maintain a clean, effective grinding surface.
Material-Specific Considerations
Hard Materials
- May require starting with coarser grits (120-180)
- Can tolerate higher pressure
- May need longer grinding times per step
- Less prone to deformation
Soft Materials
- Start with finer grits (240-320) to minimize damage
- Use lighter pressure to avoid deformation
- Shorter grinding times may be sufficient
- More prone to smearing - monitor carefully
Work-Hardening Materials
- Use consistent, moderate pressure
- Avoid excessive grinding time
- May benefit from intermediate polishing steps
- Monitor for deformation carefully
Troubleshooting Common Issues

Proper grinding technique helps avoid contamination and surface defects. Clean samples between grits, use fresh abrasives, and maintain consistent pressure to prevent artifacts.
Scratches Not Removing
Check abrasive condition and contamination before adjusting time or load. In practice, the most common causes in rough order:
- Loaded or glazed paper (swarf welded into the abrasive, common on soft alloys) - the paper looks fine but stops cutting; replace it
- Coarse particles embedded in finer paper from dried slurry on a shared platen - the paper no longer cuts at its nominal size; use fresh paper and rinse the platen, not just the sample
- A stray oversize particle in fresh paper - one or two deep unidirectional scratches on an otherwise clean surface; run a fresh piece
- Platen contamination independent of the paper - rinse and wipe the platen before mounting fresh paper
- Insufficient grinding time at the current grit, or a skipped grit - valid causes, but only after the abrasive, platen, and sample are confirmed clean
- Not rotating the sample 90° between grits on unidirectional (belt or stationary) grinding
Excessive Deformation
- Pressure too high
- Grinding time too long
- Grit too coarse for material
- Insufficient lubrication
Uneven Surface
- Inconsistent pressure application
- Not covering entire surface evenly
- Worn or damaged grinding paper
- Sample not flat against grinding surface
Contamination
- Not cleaning sample between grits
- Using contaminated lubricant
- Cross-contamination from previous steps
- Dirty grinding equipment
Recommended Equipment

Hand & Belt Grinders
Hand and belt grinders handle manual planar grinding and rapid initial material removal, with water cooling to limit heat and flush swarf.
View Hand & Belt Grinders →
Manual Polishers
Manual grinder-polishers provide variable platen speed for both grinding and polishing steps. Available in single, double, or large wheel configurations.
View Manual Polishers →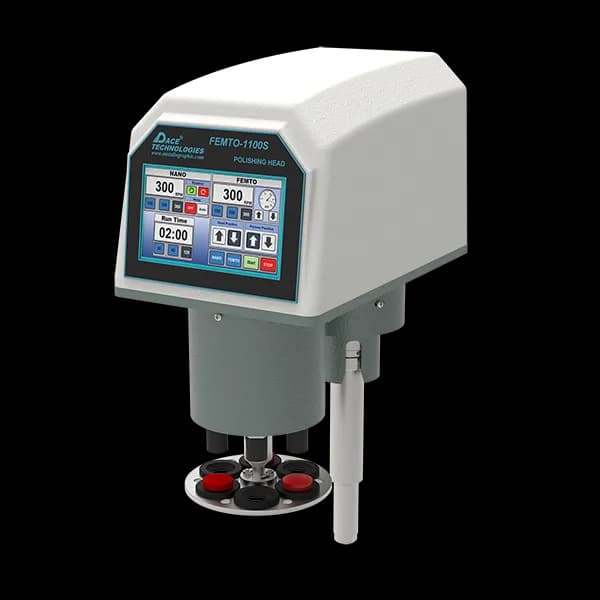
Semi-Automated Polishing Attachments
Semi-automatic power heads attach to manual polishers to automate force application and improve consistency.
View Semi-Automatic Attachments →Explore More Procedures
Browse our comprehensive procedure guides for material-specific preparation methods and get personalized recommendations.