Metallography Equipment Overview
Learn about the essential equipment used in metallography, from sectioning and mounting to grinding, polishing, and microscopy. Understand what equipment you need to set up a metallography laboratory.
Table of Contents
Introduction
A well-equipped metallography laboratory requires specialized equipment for each step of the sample preparation process. From cutting samples to examining microstructures, each piece of equipment plays a critical role in producing high-quality metallographic specimens. Understanding the equipment options available helps you make informed decisions when setting up or upgrading your laboratory.
This guide provides an overview of the essential equipment categories used in metallography, with examples of PACE Technologies equipment. While specific models and features vary by manufacturer, the fundamental equipment types and their purposes remain consistent across the industry.
Note: Equipment selection depends on your specific needs, sample volume, material types, and budget. This guide provides general information to help you understand what equipment is available and what to consider when making purchasing decisions.
📹 Video Tutorials: Dr. Donald Zipperian, founder of PACE Technologies, has created instructional videos demonstrating equipment usage. Watch these videos in our process guides:
- Precision Sectioning
- Compression Mounting
- Castable/Cold Mounting
- Manual Grinding and Automated Systems
- Vibratory Polishing
Visit the PACE Technologies YouTube channel for more equipment demonstrations and tutorials.
Sectioning Equipment
Sectioning equipment is used to cut samples from larger workpieces. The type of sectioning equipment you need depends on the materials you work with, sample size requirements, and the level of precision needed.
Abrasive Cutters
Abrasive cutters use rotating abrasive wheels (typically aluminum oxide or silicon carbide) bonded in a resin or rubber matrix to cut through materials. They are versatile and can handle a wide range of materials and sizes, from soft non-ferrous metals to hard steels and some ceramics. Abrasive sectioning is the most common method for general metallographic work.
When to Use Abrasive Sectioning: Choose abrasive cutters for most standard metallographic applications, especially when cutting metals, larger samples, or when cost-effectiveness is important. Abrasive sectioning is faster than precision wafering but generates more heat and may cause more deformation in soft or delicate materials.
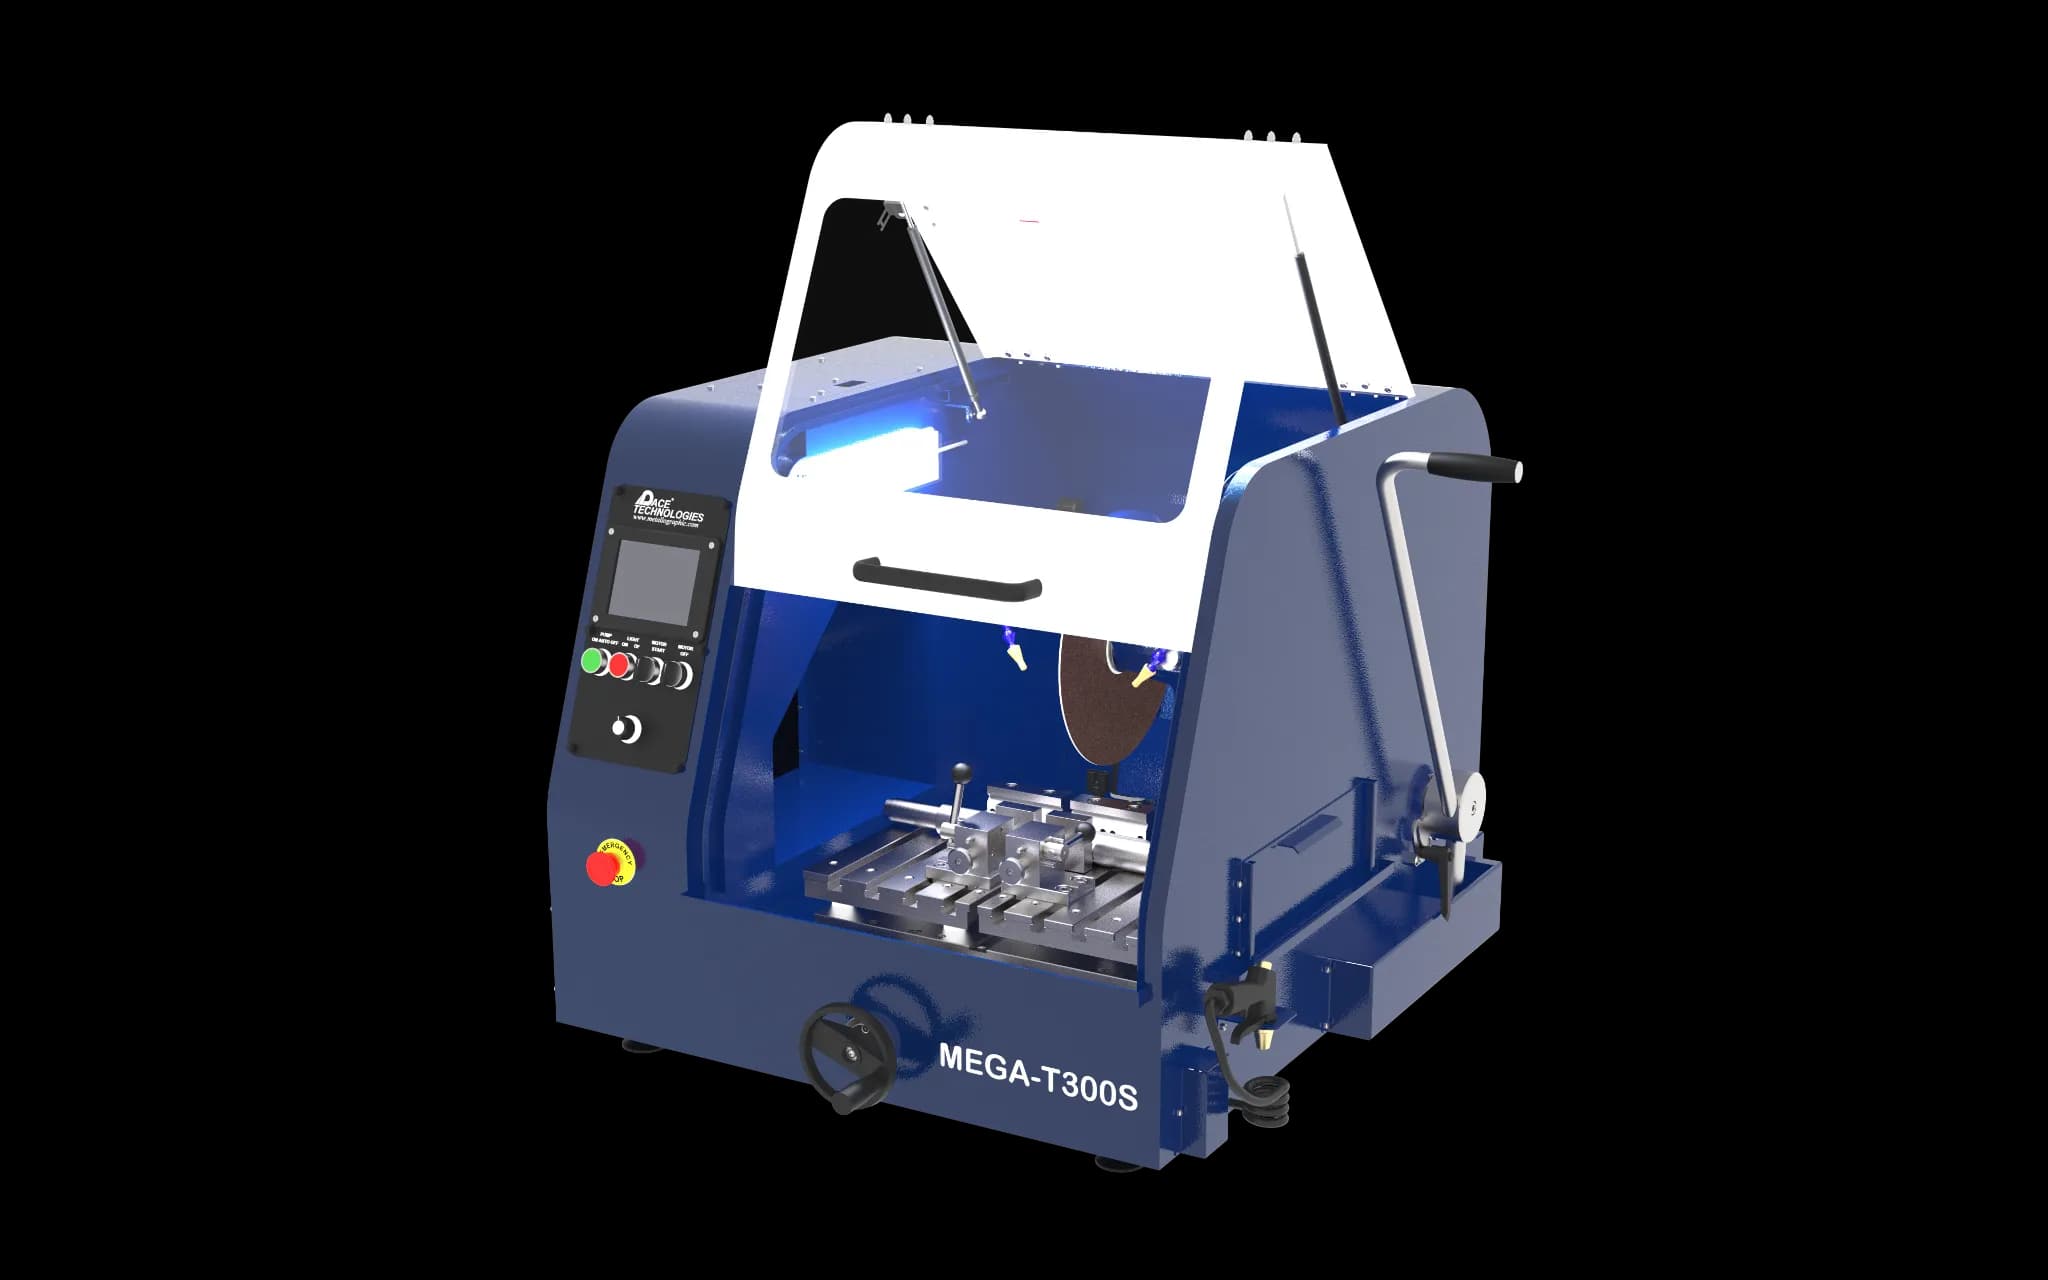
Manual Abrasive Cutters
Operator-controlled cutting with manual feed. Suitable for low to medium volume work and when operator control over cutting speed is important.
- • Manual feed control
- • Cost-effective for smaller labs
- • Good for various material types
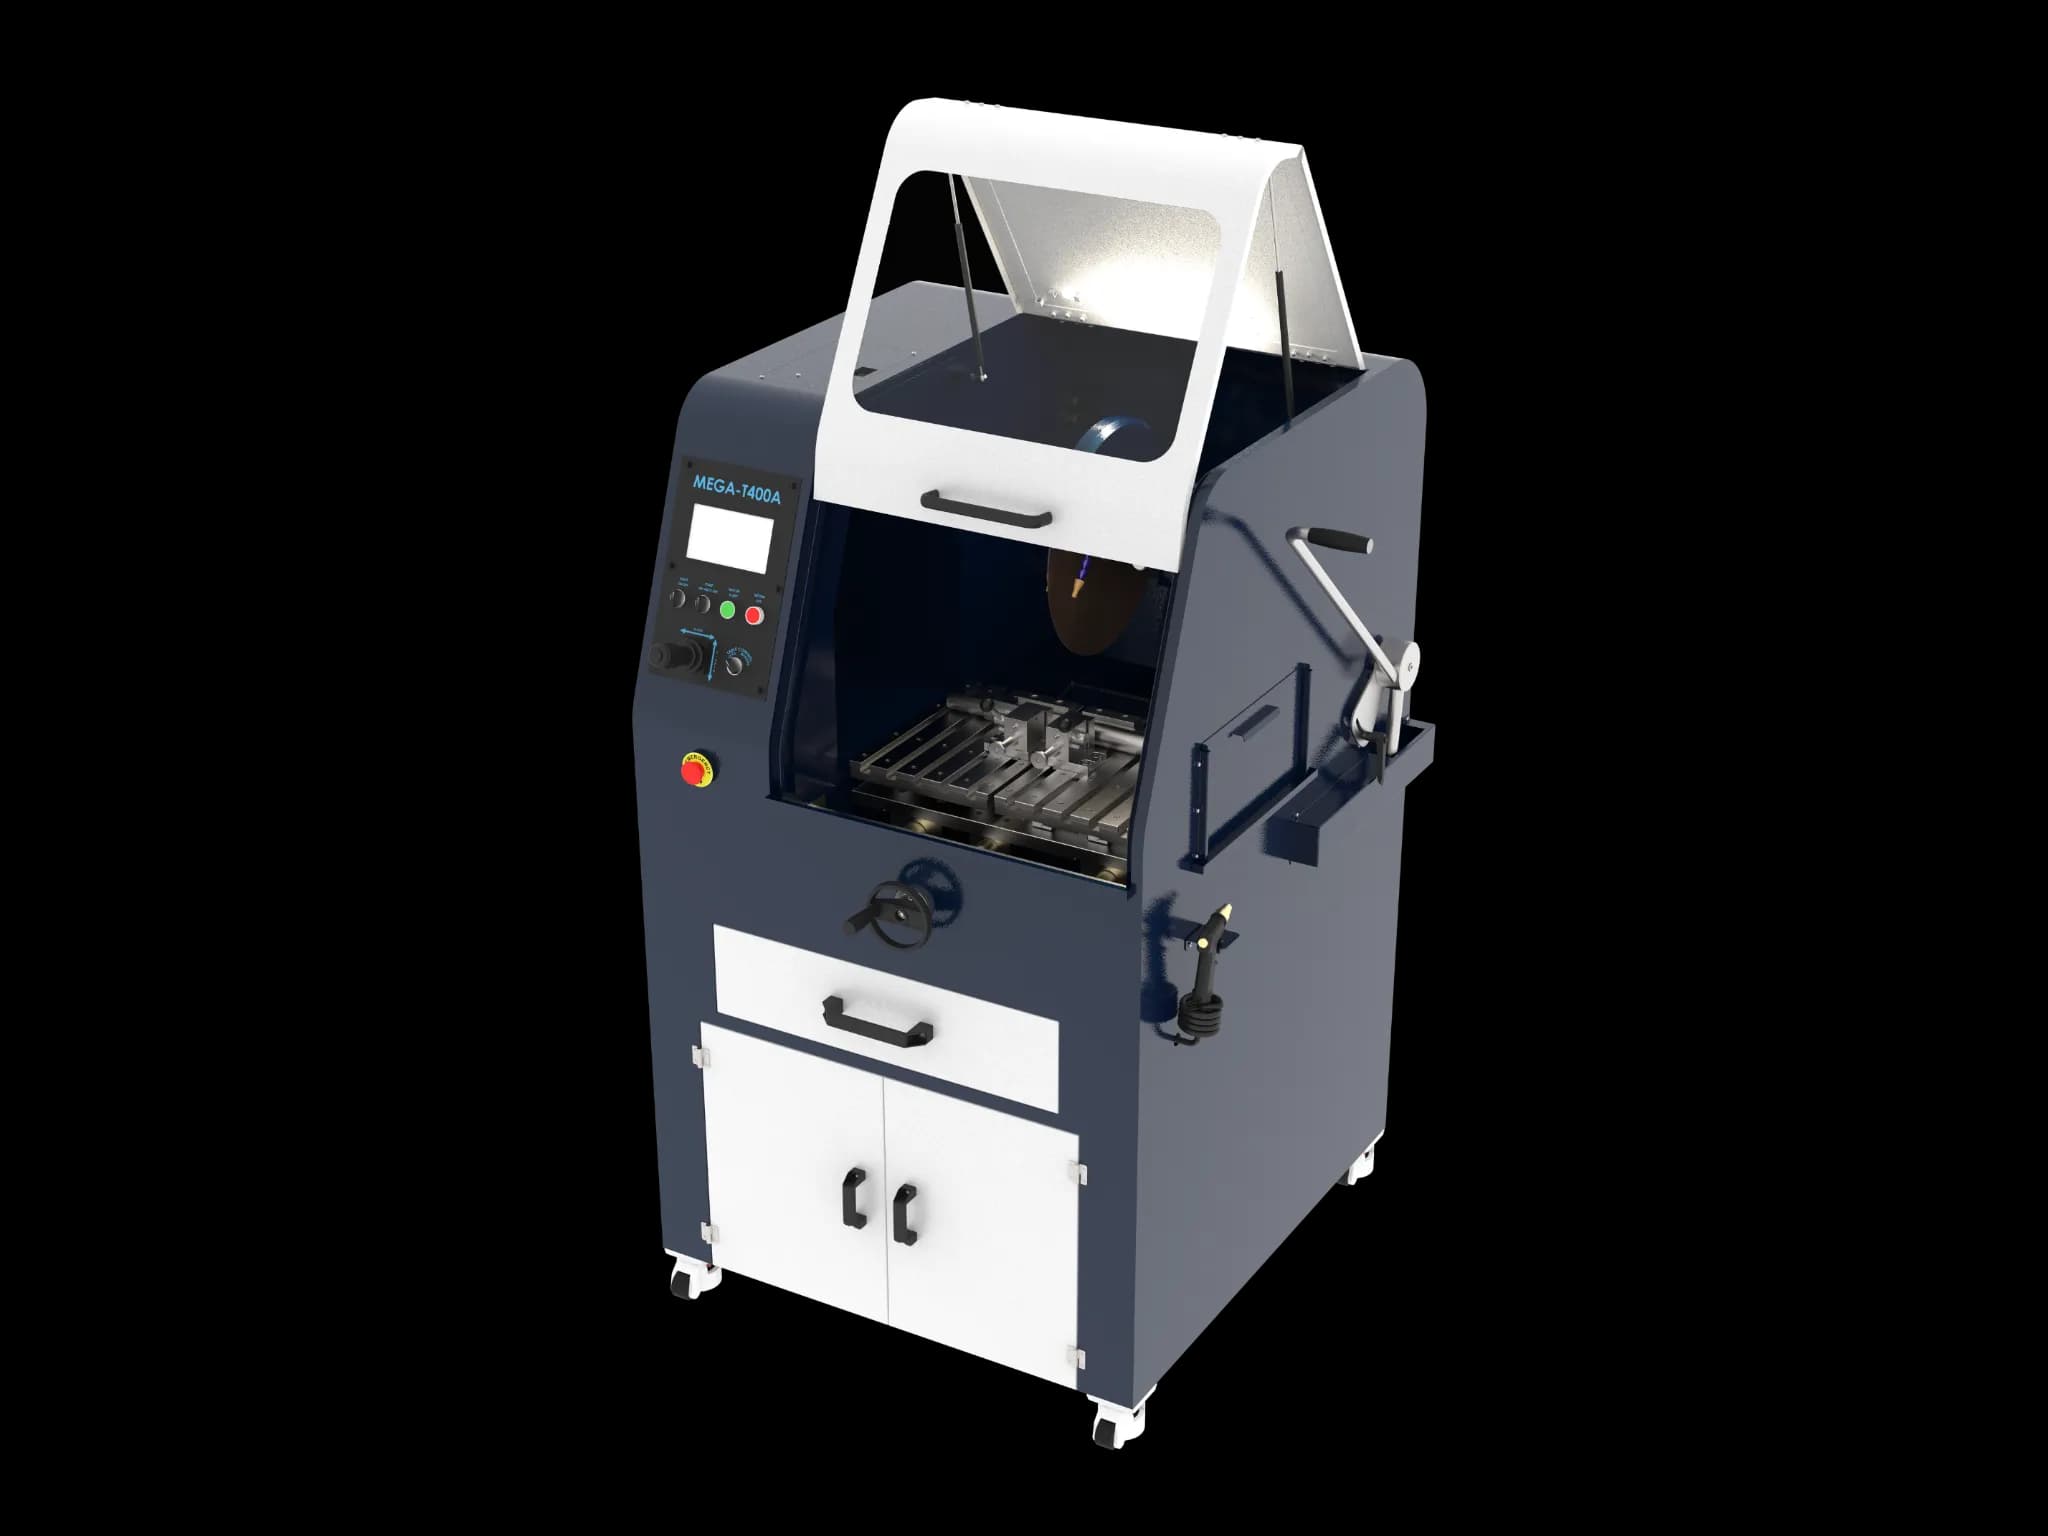
Automated Abrasive Cutters
Programmable cutting with automatic feed control. Ideal for high-volume work, consistent cutting parameters, and reduced operator fatigue.
- • Programmable cutting parameters
- • Consistent, repeatable results
- • Higher throughput
Precision Wafering Saws
Precision wafering saws use thin diamond or CBN (Cubic Boron Nitride) blades for cutting with minimal damage and deformation. These saws produce very thin cuts (kerf widths typically 0.1-0.5mm) with minimal heat generation and are essential for delicate materials, small samples, thin sections, and applications requiring minimal deformation. They are particularly important for electronic components, ceramics, heat-sensitive materials, and when sectioning damage must be minimized.
When to Use Precision Wafering: Choose precision wafering saws when working with delicate materials, small samples, thin sections, heat-sensitive materials, or when minimal sectioning damage is critical. Precision sectioning produces a damage layer roughly ten times thinner than abrasive cutoff, though it is slower and more expensive. Essential for PCB preparation, ceramic analysis, and EBSD sample preparation.
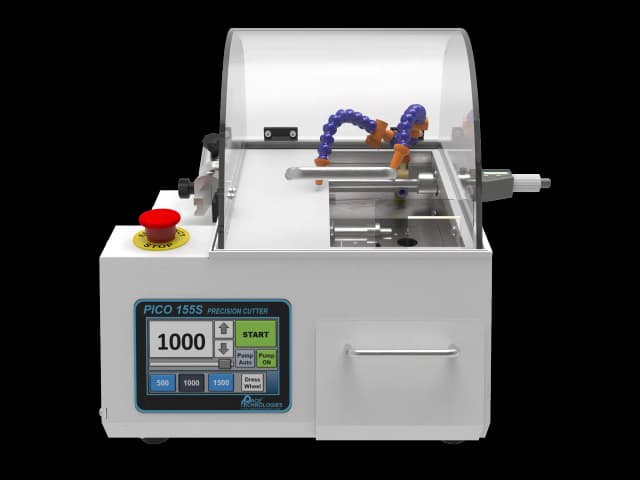
Gravity Feed Precision Cutters
Gravity-fed cutting mechanism provides consistent, low-damage sectioning with minimal operator intervention. The weight of the cutting head provides consistent feed pressure. Excellent for delicate materials, small samples, and when consistent cutting parameters are needed.
- • Consistent feed pressure from gravity
- • Minimal operator intervention required
- • Ideal for delicate and small samples
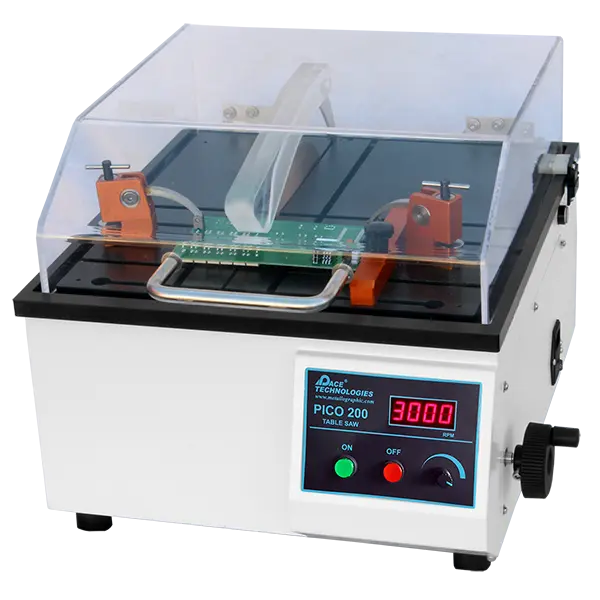
Table Feed Precision Cutters
Motorized table feed provides automated precision cutting with programmable feed rates. Offers excellent control and repeatability for high-precision applications. Ideal for production environments and when precise, repeatable cutting parameters are required.
- • Programmable feed rates
- • Excellent repeatability
- • Ideal for production and high-precision work
Mounting Equipment
Mounting equipment embeds samples in resin to create standardized, easy-to-handle mounts. Different mounting methods are available depending on your needs.
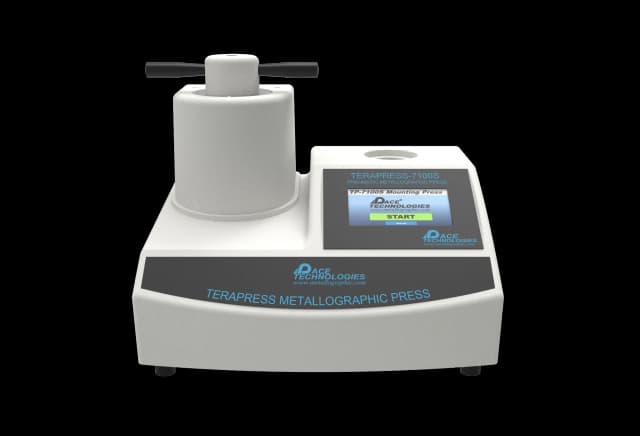
Compression Mounting Presses
Compression mounting uses heat (typically 150-180°C) and pressure (typically 3,000-4,500 psi) to embed samples in thermosetting resins. This method is fast (complete cycles typically run about 2-10 minutes) and produces durable, hard mounts with excellent edge retention. Ideal for high-throughput laboratories and standard metal samples.
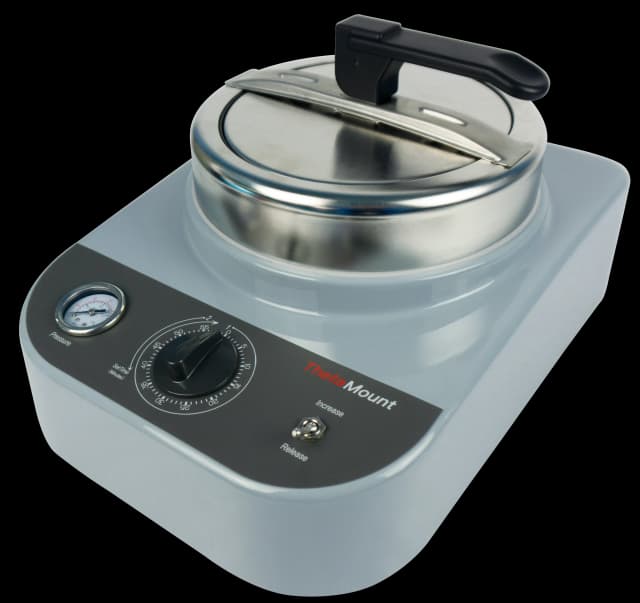
Pneumatic Mounting Presses
Air-powered compression mounting using compressed air to generate pressure. Fast cycle times and consistent pressure application. Good for medium to high volume work. Generally more cost-effective than hydraulic systems for standard applications.
- • Fast cycle times
- • Consistent pressure application
- • Cost-effective for standard applications

Hydraulic Mounting Presses
Hydraulic-powered compression mounting using hydraulic fluid to generate pressure. Higher pressure capability than pneumatic systems, making them suitable for larger samples, harder mounting materials, or when maximum pressure is required for optimal edge retention.
- • Higher pressure capability
- • Suitable for larger samples
- • Ideal for harder mounting materials
Castable Mounting Systems
Castable mounting (also called cold mounting) uses room-temperature or low-temperature curing resins that cure without the high heat and pressure of compression mounting. This method is ideal for heat-sensitive samples, delicate materials, and when compression mounting isn't suitable. Curing times vary from about 10-15 minutes for fast acrylics to overnight (6-12 hours) for slow-cure epoxies. Castable mounting is also useful for mounting multiple samples simultaneously or when working with irregular shapes that don't fit standard compression molds.
When to Use Castable Mounting: Choose castable mounting for heat-sensitive materials (e.g., some aluminum alloys, polymers, composites), delicate samples that could be damaged by pressure, when mounting multiple samples at once, or when working with irregular shapes. Compression mounting is generally faster and produces harder mounts, but castable mounting is essential when heat or pressure would damage the sample.
Pressure Mounting
Room-temperature curing under moderate pressure (typically 30-50 psi) for faster cycles and improved resin flow. Reduces bubble formation and improves edge retention compared to atmospheric curing.
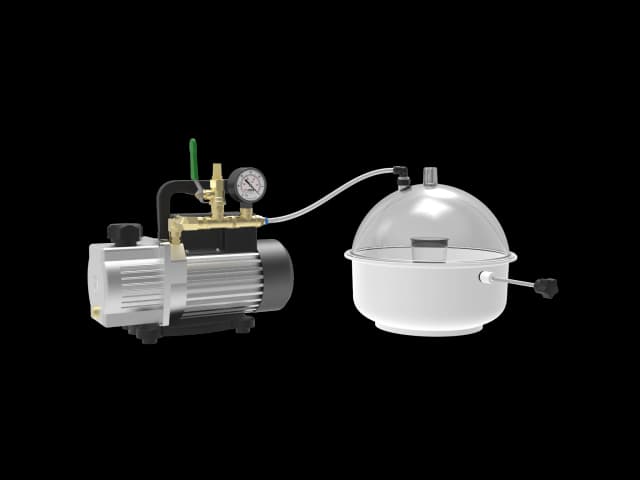
Vacuum Mounting
Removes air bubbles from the resin before and during curing, producing clear, bubble-free mounts. Essential for transparent mounting materials and when bubble-free mounts are critical.
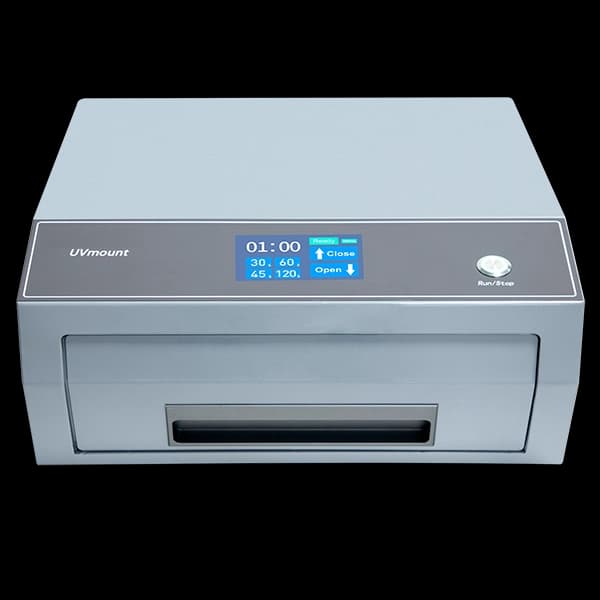
UV Curing
Fast UV-cured mounting for rapid turnaround (typically 5-15 minutes). Uses UV light to cure specialized resins quickly. Ideal for high-throughput applications with appropriate resin systems.
Grinding & Polishing Equipment
Grinding and polishing equipment creates flat, scratch-free surfaces suitable for microscopic examination. Equipment ranges from manual systems to fully automated polishers.
Manual Grinder Polishers
Manual systems provide operator control over the preparation process. The operator controls pressure, speed, rotation direction, and technique. Suitable for low to medium volume work, learning environments, and when flexibility to adapt techniques for different materials is important.
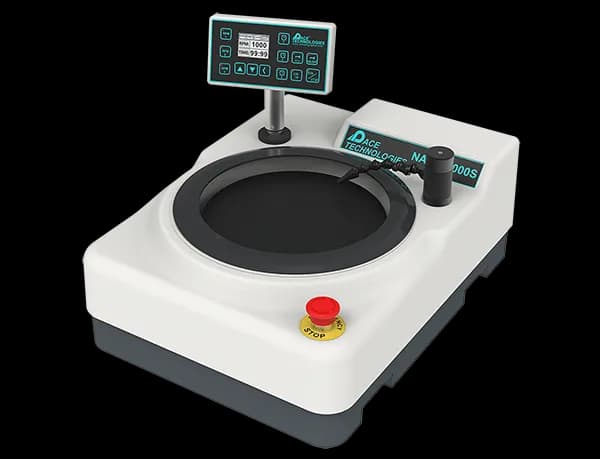
Manual Grinder Polishers
Single-wheel manual systems for grinding and polishing. Operator controls pressure, speed, and technique. Cost-effective and versatile.
- • Single or dual wheel options
- • Operator-controlled preparation
- • Suitable for various materials
Hand & Belt Grinders
Belt grinding systems for initial material removal and rough grinding. Useful for removing large amounts of material quickly.
View Belt Grinders →Semi-Automated Grinder Polishers
Semi-automated systems provide programmable preparation cycles with automatic head movement and force application. The operator loads samples and selects the program, but the system controls the preparation parameters. This provides a good balance between automation and flexibility, ensuring consistent results while allowing operator oversight.
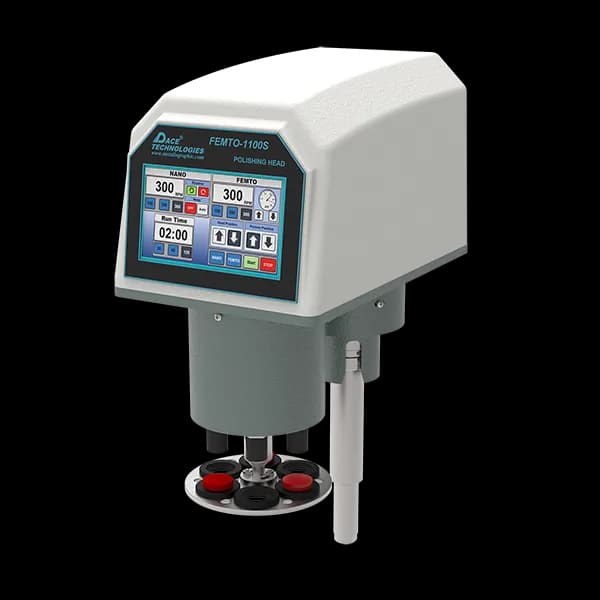
Semi-Automated Systems
Programmable preparation cycles with automatic head movement. Operator loads samples and selects program. Consistent results with reduced operator time.
View Semi-Automated Systems →Controlled Removal Polishers
Advanced systems with precise material removal control. Essential for applications requiring exact material removal rates or depth measurements, such as PCB preparation, thin film analysis, and case depth measurements.
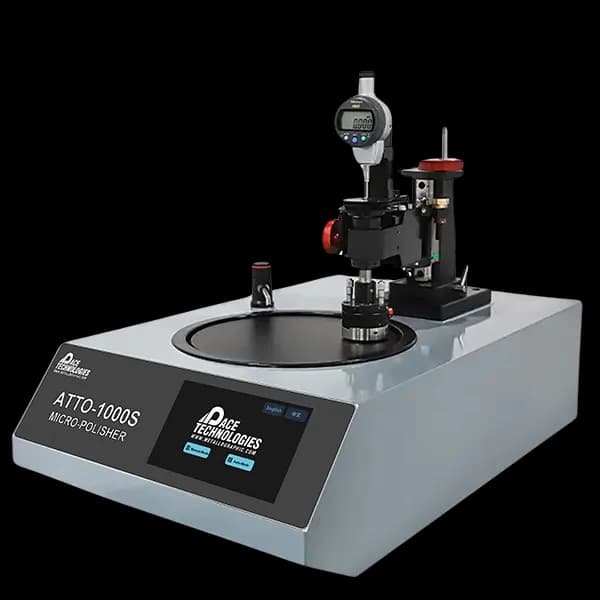
Controlled Removal Systems
Precise material removal control for applications requiring exact depth measurements or controlled material removal rates. Ideal for plano-parallel sample preparation and applications where material removal must be precisely controlled.
- • Precise depth control and measurement
- • Ideal for thin sections and coatings
- • Essential for PCB and electronic component preparation
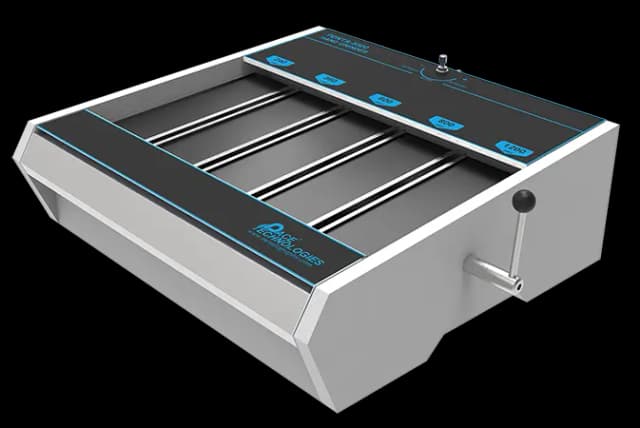
Vibratory Polishers
Vibratory polishing uses a low-energy, high-frequency oscillation with only the weight of the sample (no applied pressure) to remove residual subsurface deformation over long cycles (typically 1-24 hours). Because no force is applied, it produces a stress-free finish that rotary polishing cannot deliver. This method is particularly effective for EBSD (Electron Backscatter Diffraction) sample preparation, soft metals that smear under applied force, and applications requiring minimal deformation.

Vibratory Polishing Systems
Final polishing method that removes subsurface damage and maintains flatness and planarity. Well suited to batch processing and applications requiring minimal deformation.
- • Removes subsurface damage without introducing new deformation
- • Superior flatness and planarity
- • Ideal for EBSD preparation
- • Batch processing capability
- • Reduces operator variability
Choosing Between Polishing Methods: Manual systems offer flexibility and are cost-effective for low-volume work. Semi-automated systems provide consistency and reduce operator time. Controlled removal systems are essential for precision applications. Vibratory polishing is ideal for final polishing, especially for EBSD preparation and when minimal deformation is critical.
Microscopy Equipment
Microscopes are essential for examining prepared samples and analyzing microstructures. The type of microscope you need depends on your analysis requirements.
Metallurgical Microscopes
Metallurgical microscopes use reflected light illumination to examine opaque samples, unlike biological microscopes that use transmitted light. They are essential for routine metallographic examination and microstructure analysis. These microscopes are designed to work with polished and etched samples, providing the magnification and illumination modes needed to reveal microstructural features.
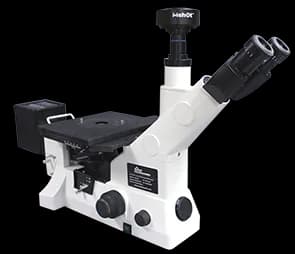
Metallurgical Microscopes
Reflected light microscopes for examining prepared metallographic samples. Standard equipment for microstructure analysis.
- • Brightfield, darkfield, and DIC (Differential Interference Contrast) illumination modes
- • Magnifications typically from 50x to 1000x or higher
- • Digital imaging capabilities for documentation and analysis
- • Polarized light options for certain applications
Stereo Microscopes
Low-magnification 3D viewing (typically 5x to 50x) for sample inspection, fracture surface examination, and general sample observation. Essential for macroscopic examination before and after preparation, checking for defects, and orienting samples.
- • Low magnification (5x-50x typical range)
- • 3D depth perception
- • Useful for fracture analysis and sample inspection
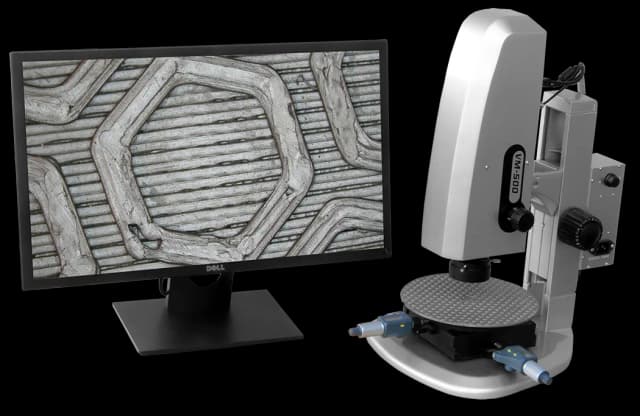
Image Analysis Systems
Digital imaging and analysis systems for capturing, storing, and analyzing microstructures. Essential for documentation and quantitative analysis.

Image Analysis Systems
Software and hardware for capturing, analyzing, and quantifying microstructural features. Includes grain size measurement, phase quantification, and automated analysis.
View Image Analysis Systems →Hardness Testing Equipment
Hardness testing equipment measures material hardness, often on prepared metallographic samples. Different test methods are available depending on requirements.
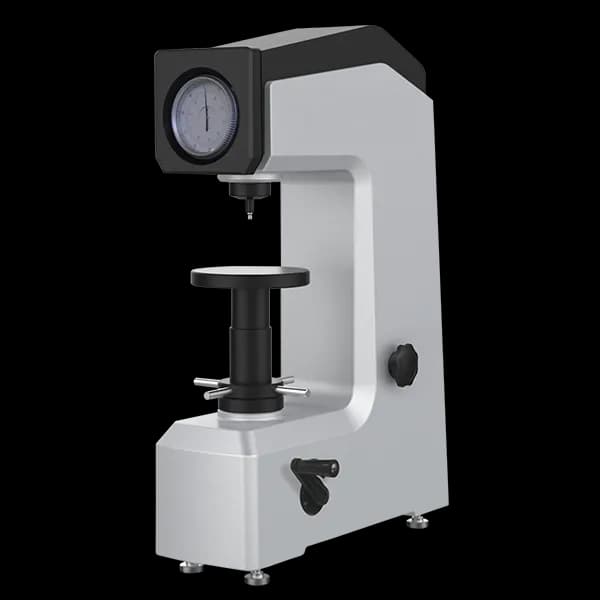
Rockwell Hardness Testers
Common macrohardness testing method using indentation depth measurement. Fast testing with direct readout, suitable for a wide range of materials and hardness levels. Uses different scales (A, B, C, etc.) for different material types and hardness ranges.
- • Fast, direct readout
- • Multiple scales for different materials
- • Suitable for production testing
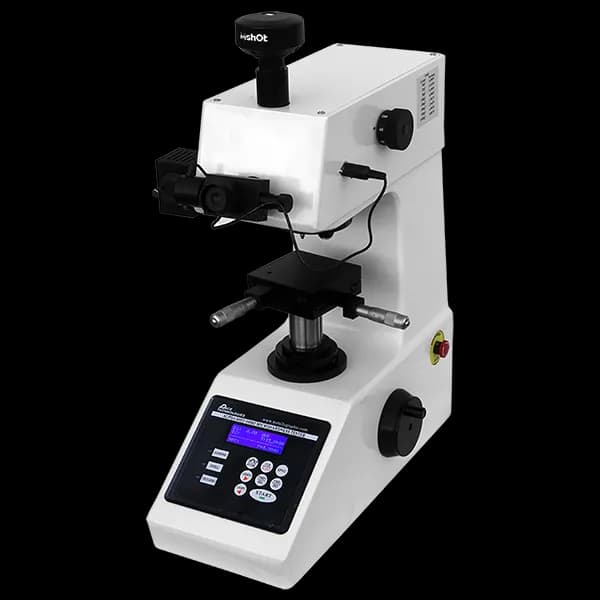
Microhardness Testers
Vickers or Knoop indentation testing for small areas, thin samples, and precise hardness measurements. Uses much smaller indenters and lower loads than macrohardness testers. Essential for case depth measurements, small feature analysis, and when testing individual phases or microstructural features.
- • Vickers and Knoop test methods
- • Low loads (typically 10g to 1000g)
- • Essential for case depth and small feature analysis
Consumables & Accessories
In addition to equipment, metallography requires various consumables and accessories for sample preparation and examination.
Essential Consumables
- Abrasive papers and grinding discs: Various grit sizes for progressive grinding
- Polishing cloths and pads: Different types for different materials and polishing stages
- Diamond suspensions and pastes: For polishing with diamond abrasives
- Oxide polishing compounds: For final polishing stages
- Mounting resins: Compression and castable mounting materials
- Etchants: Chemical reagents for revealing microstructures
- Cutting blades: Abrasive wheels and diamond blades for sectioning
- Cleaning supplies: Solvents, detergents, and cleaning materials
Accessories
- Sample holders and fixtures: For securing samples during preparation
- Measuring tools: Calipers, micrometers, and rulers
- Safety equipment: Personal protective equipment, fume hoods, safety cabinets
- Storage: Sample storage cabinets and organization systems
- Documentation: Labels, markers, and documentation systems
Consumable Management: Maintain adequate supplies of consumables to avoid workflow interruptions. Track usage patterns and establish reorder points. Quality consumables are essential for consistent, high-quality results.
Laboratory Setup
A well-designed metallography laboratory provides efficient workflow, safety, and quality results. Consider the following when setting up your laboratory.
Space Requirements
- Workflow layout: Arrange equipment in logical sequence (sectioning → mounting → grinding → polishing → microscopy)
- Adequate space: Allow room for equipment operation, sample handling, and movement
- Ventilation: Ensure proper ventilation, especially for sectioning and etching areas
- Lighting: Good general lighting plus task lighting for microscopy
Safety Considerations
- Fume hoods: For etching and chemical handling
- Safety cabinets: For chemical storage
- Eye wash stations: Accessible emergency equipment
- Fire safety: Appropriate fire extinguishers and suppression systems
- Electrical: Proper electrical outlets and grounding for equipment
Utilities
- Water: For cooling, cleaning, and some preparation steps
- Compressed air: For cleaning samples and equipment
- Drainage: Proper drainage for water and chemical waste
- Electrical: Adequate power supply for all equipment
Planning Tip: Consider future expansion when planning your laboratory layout. Leave space for additional equipment and ensure utilities can support growth. Consult with equipment manufacturers for specific space and utility requirements.
Selecting Equipment
Choosing the right equipment depends on your specific needs, budget, and workflow requirements. Consider the following factors when making equipment decisions.
Get Personalized Equipment Recommendations
Not sure which equipment is right for your lab? Use our interactive tool to get personalized equipment and consumable recommendations based on your specific materials, sample requirements, and workflow needs.
Build Your Lab →Key Considerations
- Sample volume: High-volume labs (10+ samples per day) benefit from automation, while low-volume labs may prefer manual systems. Consider both current and projected volume.
- Material types: Different materials may require specialized equipment or capabilities. For example, soft materials may need vibratory polishing, while hard ceramics may require controlled removal systems or specialized techniques.
- Precision requirements: Applications requiring high precision (e.g., case depth measurements, thin film analysis, EBSD preparation) may need advanced equipment like controlled removal polishers or vibratory polishers.
- Budget: Balance initial cost with long-term value and productivity. Consider total cost of ownership including maintenance, consumables, and operator time.
- Operator skill level: Consider training requirements and ease of use. Manual systems require more skill but offer flexibility, while automated systems reduce operator variability but may have higher initial costs.
- Space constraints: Ensure adequate space for equipment operation, sample handling, and workflow. Some automated systems require more floor space.
- Future needs: Plan for growth and changing requirements. Consider equipment that can be upgraded or expanded as needs evolve.
Equipment Quality
Quality equipment provides:
- Consistent, reproducible results
- Reduced operator time and effort
- Lower long-term costs through reliability
- Better support and service availability
- Compatibility with consumables and accessories
Getting Started
For new laboratories or those setting up their first metallography lab, consider starting with a basic but complete setup:
- Sectioning: Manual abrasive cutter for most materials, or precision wafering saw if working with delicate materials, electronics, or ceramics
- Mounting: Pneumatic compression mounting press for standard applications, or castable mounting system if working with heat-sensitive materials
- Grinding & Polishing: Manual grinder polisher with single or dual wheels. This provides flexibility to learn techniques and adapt to different materials
- Microscopy: Metallurgical microscope with digital imaging capabilities for documentation and analysis. Include brightfield and darkfield illumination modes at minimum
- Consumables: Essential grinding papers (240, 320, 400, 600 grit), diamond polishing suspensions (6μm, 3μm, 1μm, 0.25μm), polishing cloths, mounting resins, and basic etchants for your materials
- Safety: Fume hood for etching, personal protective equipment, and proper storage for chemicals
This basic setup allows you to prepare and examine samples while learning techniques. As your needs grow and your workflow becomes more defined, you can expand with automation, specialized equipment, or additional capabilities. Many laboratories start with manual systems and add automation as volume increases or consistency requirements become more critical.
Consultation and Support
Equipment manufacturers and suppliers can provide valuable guidance on equipment selection. Consider:
- • Requesting demonstrations or trials
- • Consulting with experienced metallographers
- • Reviewing application notes and case studies
- • Understanding service and support options
- • Planning for training and operator education
Ready to Learn More?
Now that you understand the equipment used in metallography, explore our guides on sample preparation techniques and safety practices.